How to calibrate a Rosemount DP (Differential Pressure) transmitter with a HART Communicator ?
Steps involved in the calibration
1.Connect the DP transmitter (Rosemount) to a power supply
2.Connect the HART
3.Connect test pressure gauge
4.Calibrate zero and span of transmitter
1.Connecting the power supply to DP transmitter :
In order for you to be able to communicate with the DP transmitter you have to install a resistor in series with your power supply.
HART recommends a 250 ohm resistor After you have the resistor in series and the power supplyconnected,connect your HART 475 noting polarity.
2.Connecting with HART 475 :
The HART 475 leads have to be inserted into the HART side of your communicator.

3.Connect Test Gauge :
When dealing with a DP transmitter you always want to connect to the “High side” with your pump to apply pressure (PSI).
Make sure low side is vented to atmosphere .
Precautions need to be taken :
If you are dealing with a DP transmitter in the the correct way to test is to always have the transmitter in bypass and notify the control room operator of what is about to be done.
The very first thing to do is equalize the manifold
Isolate the process pressure
Vent the pressure
Separate the high and low sided and connect to the high side and have the low side vented to atmosphere
It is very important to follow these steps failure to properly equalize will most likely result in deformation of the DP transmitter sensing element.
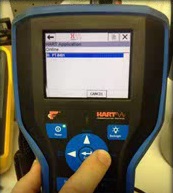
4.Connecting HART Communicator :
When you are all powered up turn on your HART 475 on the first screen select HART.Next you want to press right arrow when the HART 475 sees your instruments Use right arrow key to select your next option or OK button on touch screen.

Go to the following menu.
Service tools>Maintenance >Pressure Calibration>
Now start with your zero calibration.Make sure you are vented on low side and the high side is vented on the test pump.
Now its time to span the meter.
Make sure your test pump meter is reading zero when open then close the vent on your test pump.
Select Upper using one on the the keypad or while selected the right arrow and follow the prompts on screen.
Now its time to apply the upper range input.
Start slow with the pump up to see how fast the pressure rises.Over ranging will cause damage.
Apply the correct pressure
Select “OK” and follow prompts on the screen.
After you select OK when the pressure is stable the next screen will allow you to tell exactly what it is reading.
Enter in the text box the exact reading on your test pump the moment you pressed ok for the pressure being stable.
Select “ENTER” and follow the prompts on screen
Go to “Home” .Then go to “Overview” and verify the calibration